
We started drawing in 2022 with no training, no plan, and a dining table that doubles as a craft station every Saturday. This is what we learned, what flopped, and what actually helped.
1. Start Here: How to Learn to Draw as a Complete Beginner
We are Karen and Dale, two hobbyists who clear the dining table most Saturdays to draw. We both have full-time jobs. Neither of us went to art school or took a drawing course growing up. In 2022 we sat down one weekend, set a coffee mug on the table, and tried to draw it. The results were, honestly, a bit shocking. Dale’s mug leaned like it was sliding off a hill. Karen’s looked like a rectangle with a hook stuck on the side. We laughed, but we also thought: there has to be a better way to learn how to draw than just staring at a mug and hoping.
That weekend was the start of our drawing journey, and this article is the approach that got us past that point. Mistakes included.
So where do you actually start? Grab a pencil and a cheap sketch pad. Sit down for 10 to 15 minutes, a few times a week, and draw something in front of you. That is the whole secret at the beginning. Not a fancy kit, not a class, not a tutorial playlist. Just a pencil, paper, and something to look at.
Here is the thing we wish someone had told us on day one: most beginner drawings go wrong because we draw a symbol of the mug instead of the mug in front of us. We draw what we think a mug looks like, a tidy rectangle, a perfect circle on top, a little handle. But the real mug has an ellipse that tilts, sides that taper slightly, a handle that sits at an odd angle. Drawing is mostly a looking skill, and the hand follows. When we started paying attention to the actual shapes and angles instead of the idea in our heads, things improved fast.
Drawing is a skill developed through practice, observation and patience. It is a physical skill, like typing or playing guitar, so shaky lines and crooked circles are completely normal. You do not need talent. You do not need expensive materials. You do not need art school. You need short, regular practice and some patience with yourself. Beginners should focus on simple habits, observation skills and basic construction, and the rest builds from there. If you want a sense of how long humans have been drawing, cave art goes back 30,000 years, long before written language, and none of those early artists had YouTube. For a broader look at the history, see the Wikipedia overview of drawing.
Here are three exercises for your very first day:
-
Fill a page with light straight lines and curved lines. Just lines, no objects. Get used to moving the pencil.
-
Fill a page with circles and ellipses, different sizes, different tilts.
-
Pick one simple household object and draw it three times using only basic shapes. No details, no shading. Just the big shapes.
Your first 7 days of drawing:
-
Day 1: Lines and circles. Fill two pages.
-
Day 2: Draw one object from the kitchen as simple shapes, three times.
-
Day 3: Repeat day 2 with a different object.
-
Day 4: Lines and ellipses again, but try to make them smoother than day 1.
-
Day 5: Draw two objects together as shapes. Notice the gap between them.
-
Day 6: Try the same object from a different angle.
-
Day 7: Draw for fun. Anything you like, no rules.
That is a week. Ten to fifteen minutes a day. Structured exercises like these help improve line control and drawing skills without overwhelming you. If you want the bigger picture behind these exercises, read what drawism is, which we wrote for complete beginners.
2. Warming Up: Training Hand-Eye Coordination
We used to skip warm ups entirely. We would sit down on Saturday, pick up the pencil, and jump straight into a still life. After about a month, we noticed that our first few minutes of drawing always looked worse than the rest of the session. The lines were tight, the shapes were stiff. So we started warming up, and the difference was immediate. Warm ups are like stretching before exercise. They loosen the hand, wake up the eye, and remind your drawing muscles how to move.
Keep warm ups to 5 to 10 minutes, on scrap paper or in the back of your sketchbook. Low pressure, no expectations. We like a “ten circles in a row” drill: draw ten circles freehand, then look at how they differ. Some will be lumpy, some flat. That is fine. The point is to practice hand-eye coordination and get the arm moving.
Quick warm up drills:
-
Straight lines across the page, trying for even spacing
-
Long and short curved lines, swooping from one side to the other
-
Overlapping circles in different sizes
-
Simple spirals, clockwise and counterclockwise
-
Rows of small boxes drawn without a ruler
-
A line-pressure drill: draw a single line that starts light and ends dark, using only hand pressure. It feels silly. It is genuinely useful.
Try drawing from the shoulder for smoother curves and longer strokes, not just the fingers and wrist. The bigger the movement, the smoother the line tends to be. And before you put pencil to paper for a tricky angle, try tracing short straight “angle lines” in the air first. Hold the pencil up, align it with what you see, then bring that angle down to the page. It trains you to check angles before committing.
3. Seeing in Basic Shapes: The Core Drawing Fundamental
This is, in our opinion, the single most important drawing fundamental for a complete beginner. Learning to see everything as combinations of basic shapes before adding any detail changed the way we draw more than anything else.
Basic shapes include circles, rectangles and triangles. When we say “drawing basic shapes,” we mean practicing those forms in different sizes and tilts, then using them as building blocks. A mug is a cylinder with an oval on top. A phone is a rectangle. A teapot is a ball plus a cone plus a cylinder. An orange is a sphere. A cereal box is, well, a box.
You can simplify complex subjects into basic shapes, and that is the whole trick. Your brain stops panicking about “how do I draw a teapot” and instead thinks “how do I draw a ball, a cylinder, and a cone next to each other.” Recognizing overall shapes helps simplify drawing and keeps you from getting lost in details too early.
Try this:
-
Set a timer for 15 minutes
-
Pick 5 random household objects
-
Draw each one as a small thumbnail using only simple shapes: no detail, no shading, no outlines of handles or spouts
-
Use light lines and keep it rough
-
When you finish, look at each thumbnail and ask: does the proportion feel right? Is the shape too tall, too wide?
This practice makes it much easier later when you want to draw people, draw animals, or tackle complicated subjects. The brain learns to break down complex subjects into major shapes first, and everything builds from there.
4. Light Lines First: Building the Underdrawing
Every drawing should begin with light lines. We call this the “ghost” or the underdrawing. Drawing with light lines allows for easier corrections, because you can nudge a shape, shift a proportion, or move an entire section without leaving deep grooves in the paper.
Hold the pencil more loosely and a bit further back from the tip. This naturally encourages lighter pressure. If you still dig in too much, try a harder pencil like HB or 2H for the first pass. Drawing begins with light lines for basic shapes, and you darken only the lines you are sure about later.
The drawing process goes like this: very light shapes first, then adjust proportions of basic shapes before adding details, then check angles, then gradually commit to the lines that feel right. When we rushed straight to dark outlines in 2023, our drawings looked stiff and overworked. The fix was simple. We started leaving the searching lines, those slightly messy construction marks, and drawing over them instead of rubbing out every wobble. The drawings ended up livelier, and we saved a surprising amount of time.
Line-pressure mistakes to avoid:
-
Pressing too hard on the first pass (you will use the eraser less than you think once you draw lightly)
-
Erasing constantly instead of drawing over and refining
-
Outlining every contour early in the drawing, which locks you in before proportions are right
-
Gripping the pencil like a pen for a signature, tight and close to the tip
-
Trying to make every line perfect on the first try
5. Gesture Drawing: Capturing Movement and Energy
Gesture drawing is quick, loose sketching that focuses on the overall flow and posture of a subject rather than details. Think of it as capturing the energy of a pose or an object in 30 seconds to 2 minutes. It is not only for figure drawing. We gesture draw a plant, a pile of laundry, or a coffee mug in perspective. Anything with a sense of direction or weight works.
From our own practice: start with 10 poses at 30 seconds each from reference photos (there are free resources and websites with timed pose libraries), then do 5 at 2 minutes. Aim for energy, not accuracy. Look for the “line of action,” a single sweeping curve that runs through the main flow of the subject. Messy, overlapping lines are normal. Resist the urge to “clean” every sketch. The point is movement, not polish.
A simple 10 to 15 minute gesture routine:
-
5 poses at 30 seconds each (just the line of action and biggest shapes)
-
3 poses at 1 minute (add shoulders, hips, simple limbs)
-
2 poses at 2 minutes (a bit more detail, but still loose)
Over time, gesture drawing connects directly to long-term goals: artists working on people, pets and full scenes find that early gesture practice keeps everything feeling alive. Without it, drawings tend to feel posed and stiff.
6. Checking Angles, Proportions and Negative Space
After the first light sketch, slow down and check. We both found in 2022 that spending 3 minutes checking saved 30 minutes of painful erasing later. This single habit changed our drawing process more than any other technique.
To check angles: hold the pencil at arm’s length, align it with the edge of an object, and compare that angle on your paper. For accurate proportions, notice how tall a mug is compared to its width, then check that ratio on the page. You can measure one part against another using the pencil as a ruler at arm’s length.
Negative space is the shape of the air around and between objects. The gap between a chair’s legs is a shape too, and drawing those shapes often fixes a wobbly outline faster than fussing over the outline itself. It sounds strange, but try it: draw a simple chair or plant, then draw only the negative spaces as flat abstract shapes. You will often spot errors you missed while looking at the object.
Three checking habits to build:
-
Check angles with the pencil before committing to a line
-
Compare lengths and ratios (is this taller than it is wide? by how much?)
-
Glance at negative spaces to catch proportion errors
Our rule of thumb: roughly two glances at the subject for every one at the page. Relying solely on memory or a quick peek leads to symbol drawing, not observation drawing, and that is where most beginner errors start.
7. Drawing Basic Forms in 3D: From Flat Shapes to Simple Volume
Once flat shapes feel comfortable, the next step is thinking in three dimensions. A circle becomes a sphere. A square becomes a cube. A rectangle becomes a cylinder or a box. These basic forms are the bridge to advanced concepts like perspective and foreshortening, but we keep things gentle here.
Notice how the ellipse on top of a cylinder gets rounder or flatter as your eye level changes. Look at a glass of water from above, then bring it down to eye level. The circle on top narrows to a thin ellipse. That is perspective working in real life, no textbook needed.
Two exercises to try:
-
Draw 6 small boxes on a page. Turn each into a different object by adding small details: a gift box, a building, a book, a drawer, a suitcase, a plant pot. Same basic form, six different things.
-
Set up 3 real objects that roughly match these forms (a candle for a cylinder, an orange for a sphere, a tissue box for a rectangular prism). Light them from one side with a lamp. Lightly indicate where the light falls and where the shadow sits.
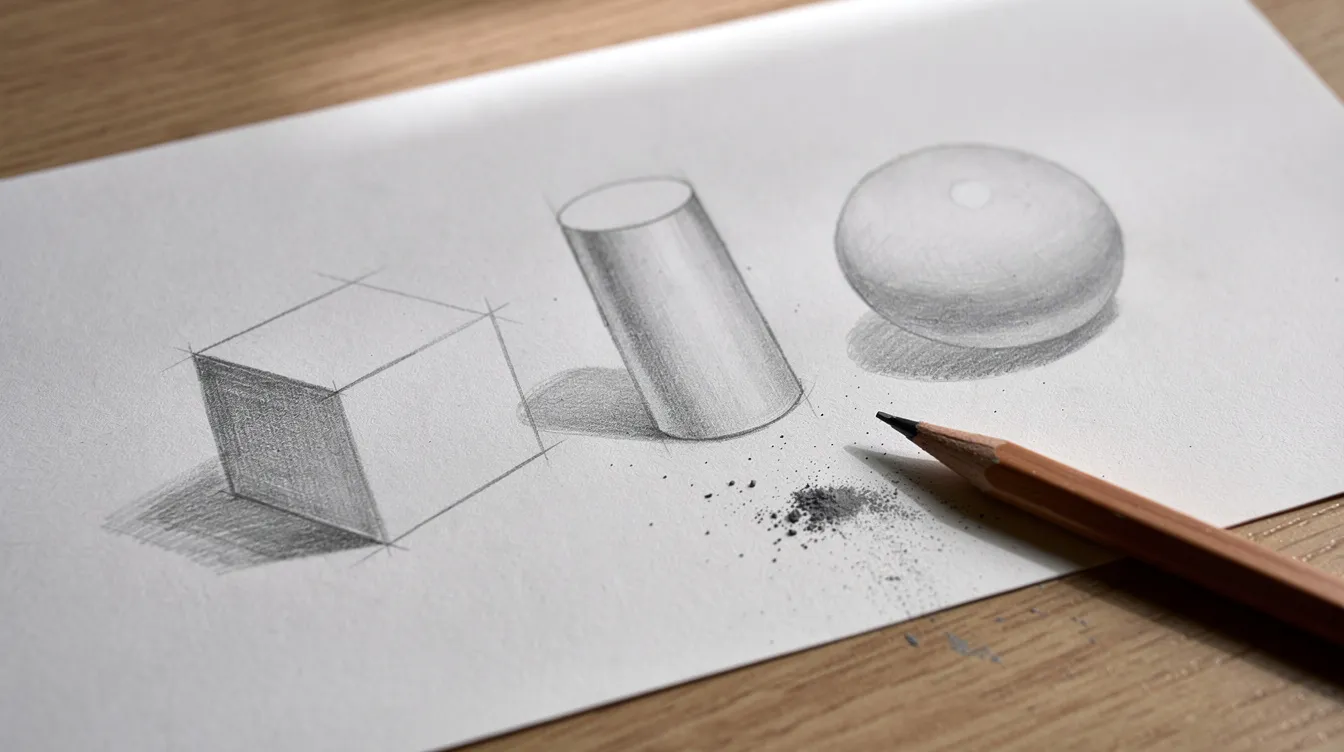
Early form drawings are about understanding direction in space, not perfect realism. Wobbliness is welcome. These forms show up everywhere, and once you see them, you cannot unsee them.
8. Lines, Textures and Mark Making for Beginners
Mark making is the different ways a pencil can touch the paper: long strokes, short dashes, dots, scribbles, hatching. It is one of the drawing fundamentals that gets overlooked because it does not feel like “real” drawing. But it is foundational. We set aside one page per week just for exploring marks, with no recognizable object in mind.
Mark families to try:
-
Parallel hatching (even, spaced lines in one direction)
-
Cross hatching (layered lines in two or more directions)
-
Tiny circular shading (small overlapping loops)
-
Broken lines (dashes and gaps)
-
Soft smudged tones (side of the pencil, blended with a finger or tissue)
-
Firm outlines (single, confident strokes)
Use hatching and cross hatching for controlled shading effects. Varied marks support later shading and texture when you want to draw things like wood grain, fabric folds, hair or foliage. Each mark type gives a different feel, and knowing a handful of them gives you choices.
A moment from our sketchbooks: in 2024, Karen redrew a plant she had drawn in 2023. The first version used the same solid outline everywhere. The second used varied light and dark lines, thicker for the pot, thinner and broken for the leaves. The difference was startling. The newer drawing looked less flat, more alive. The only change was the marks.
9. Learning to See Light and Shadow (Without Getting Fancy)
You do not need complex value charts. You need to notice where the light hits and where it does not. Shading involves adding contrast between light and dark areas, and even a simplified approach makes drawings feel solid.
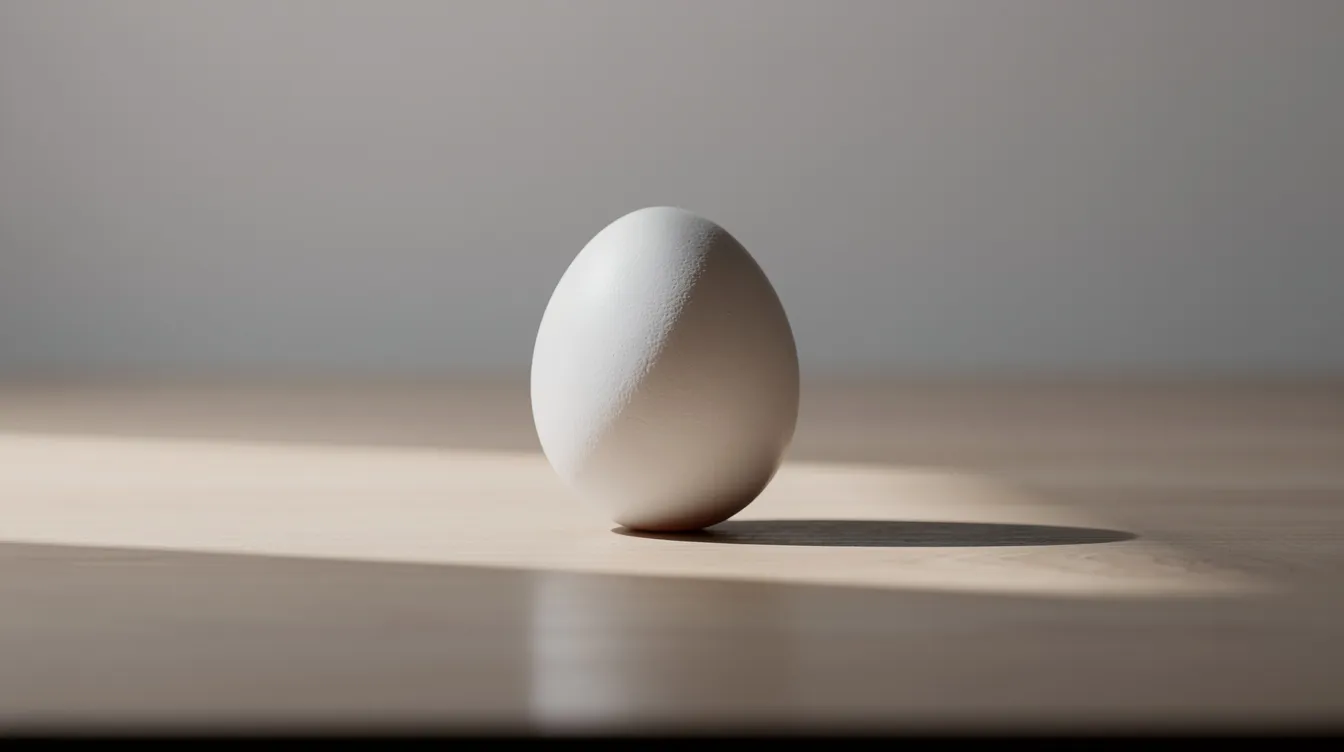
Start with a 3-value approach: light (where the lamp hits), middle (the sides that get indirect light), and dark (the shadow side and the cast shadow on the table). Set a ball or an egg on the dining table under a single desk lamp. Name the light side, the shadow side, and the cast shadow that falls on the surface. That is your map.
A simple shading exercise:
-
Lightly outline the basic shape
-
Block in only the darkest dark areas first, ignoring tiny details
-
Add the midtone next, leaving the light side of the object untouched
-
Layer darker tones gradually to avoid overworking the sketch
-
Step back and squint
Squinting helps identify values for effective shading. When you squint, subtle differences blur away and you see only the big light and dark pattern. Use a range of values, typically 3 to 5, for depth in shading. Early on, three is plenty.
Our advice: build tone in light, even layers instead of pressing hard. Slowly layering feels dull, but it gives a smoother result than one rushed dark pass, and you keep the option to go darker without digging trenches into the paper.
This connects directly to drawing faces, clothing folds, and any scene with a focal point. Understanding where light falls is the difference between a flat outline and a form that looks like it sits in real space.
10. Drawing People: A Gentle First Approach
We will be honest: drawing people is intimidating. We all notice tiny errors in faces and hands because our brains are wired to read human features. Our opinion: faces are unforgiving, so we started with objects and came back to portraits later. But you do not need to wait years.
Start with simple gesture drawings and stick figures built from basic shapes. A line of action gives you the main curve of the pose. Then add boxes and cylinders for the torso, ovals for the head, simpler shapes for limbs. Drawing faces requires understanding proportions and basic shapes, and the Loomis Method simplifies head structure into basic shapes, which makes it a good system to look into once you are ready. Understanding facial anatomy aids in drawing realistic features, but early on, just placing the eyes, nose and mouth in roughly the right spots is plenty. Eyes are often easier to draw than other facial features, so they can be a good place to start on a face. Practice drawing faces improves accuracy and confidence over time, and it does not have to be perfect to be useful practice.
A simple “draw people for 10 minutes” habit:
-
Find a few free reference images of simple standing or sitting poses
-
Spend 30 seconds on each, drawing only the line of action and major shapes
-
Try one longer pose at 2 to 5 minutes, adding a head shape and rough limbs
-
Do not worry about hands, feet, or faces yet
-
Repeat a few times a week
Advanced drawing techniques like detailed anatomy and portrait construction can come much later. For now, you are just learning to place simple forms in space. If you want to draw animals eventually, the same approach works: gesture first, basic shapes for the body, then simple detail. Animal anatomy is its own world, but the starting point is always shapes and flow.
11. Daily Practice When You Have Very Little Time
We both work full time. In 2023 and 2024, we squeezed drawing into 15 to 20 minute pockets on weeknights, and the improvement from those short sessions surprised us. Time spent on consistent short practice is more effective than infrequent long sessions. Shorter practice sessions over several days yield better results than one marathon weekend drawing day, especially for hand control.
Daily practice improves drawing skills significantly. Practice drawing regularly to build muscle memory, and repetition in drawing builds muscle memory and confidence over weeks and months.
Practice patterns that work for us:
-
A 10-minute warm up plus one 10-minute quick study
-
Three 5-minute sketches while coffee brews or during a TV show
-
Leave the pad and pencil somewhere visible so you see them
-
Pick a consistent time and stick to it
-
Set a 10-minute timer and draw whatever is nearest instead of waiting for inspiration
A possible weekly structure:
-
Two days: shapes and lines (warm ups, mark making)
-
Two days: objects from real life (still lifes, household items from different angles)
-
Two days: gesture drawing from reference photos
-
One day: draw just for fun, no rules, anything goes
Date your sketchbook pages. After two months, flip back. Progress is hard to see day to day, but it is usually obvious over a longer stretch. We keep a cheap sketchbook where nothing has to be good and pages of failed hands and lopsided cats are the whole point. If you want a nudge, here is how to start sketchbooking.
One more thing: drawing the same object with a partner or friend at the same time, then comparing results, is oddly fun. It shows how many valid ways there are to see the same mug. We do this most Saturdays and it never stops being interesting.
12. Paper, Pencils and Other Beginner-Friendly Materials
We do not sell supplies. We have tested basic student-grade materials in our own weekend sessions, and we can say this with confidence: the biggest trap for new drawers is shopping instead of drawing. A big boxed set of pencils, charcoal and pastels mostly gives you more ways to feel stuck. We go into more detail in our post on beginner art supplies.
What you actually need to start:
-
Cheap printer paper or an inexpensive sketch pad (expensive paper makes you precious about every mark, which is the opposite of what you want)
-
A couple of pencils: one HB and one 2B will cover almost everything
-
A simple eraser, kneaded or plastic
-
A sharpener, because a dull pencil makes everything look worse
We started in 2022 with a $3 pack of pencils and a supermarket sketchbook. We added better paper only after we had a few filled pads and knew what we liked. If you are curious why pencils carry letters and numbers, it is a hardness grading system: H pencils are harder and lighter, B pencils are softer and darker. HB sits in the middle. The Wikipedia page on pencils covers the grading in more depth.
We suggest starting on traditional paper rather than digital. Fewer variables, direct feedback, better line control when your drawing muscles are still developing. Once basic control and drawing fundamentals are in place, moving to a tablet and software feels natural instead of overwhelming. But the basics are the same either way.
Betty Edwards, in her well-known book on drawing, emphasizes that drawing is about learning to see rather than learning hand tricks. We have not followed her method step by step, but that idea, seeing over technique, runs through everything that has worked for us.
13. Structuring Your Drawing Sessions: From Rough to Refined
Here is the session structure we still use on weekend drawing days. It is not rigid, but having a repeatable process helps, especially when you do not know what to do next.
Session phases:
-
Warm up (5 to 10 minutes): lines, curves, circles, mark making on scrap paper
-
Gesture or loose sketch (5 minutes): capture the flow and major shapes of the subject with light lines
-
Basic shapes and proportions (5 to 10 minutes): block in the big forms, check ratios
-
Angle checks and corrections (3 to 5 minutes): hold pencil at arm’s length, look at negative spaces, adjust
-
Cleaner lines (5 to 10 minutes): darken the lines you are confident about, let searching lines stay
-
Optional shading (5 to 10 minutes): block in the darkest values, add midtones, leave highlights
For a 40-minute still life on the dining table, we spend about 10 minutes per chunk. We do not aim for a finished piece. The goal is to practice everything from the earlier sections in one sitting, from the loose sketch through to a bit of shadow. Some Saturdays the result looks decent. Some Saturdays it does not. Both are fine.
14. Common Beginner Mistakes (And How We Worked Around Them)
Our early drawings in 2022 were full of these mistakes. That is normal. Mistakes are part of the drawing process and help learning. They are not a sign to quit.
Mistake and solution pairs:
-
Pressing too hard: Start with light lines. Darken only what you are sure of. This alone fixed half our frustration.
-
Details before shapes: Set a timer and stay in the “shape only” stage for 5 full minutes. No eyes, no handles, no leaves until the big forms are right.
-
Skipping shape practice: It feels boring, but it is the fastest route to improvement. Embrace it.
-
Erasing constantly: Leave the construction lines. Draw over them. Your drawings will look more alive.
-
Never finishing a sketch: Let some drawings stay messy. Not every page needs to be a finished piece. Some pages are pure practice and that is their job.
Embracing mistakes is essential for artistic growth. Expectations of perfection hinder creative progress in drawing. Polished art on social media comes after years of practice. Compare this week’s drawing only to one from a few months ago, not to someone who has been at it for a decade. Keep a few dated early drawings visible so you can see your own progress, because it is there even when it does not feel like it.
15. Stepping Into More Advanced Concepts (When You Are Ready)
“Advanced” in this context means more structured study of perspective, anatomy, values, composition and maybe color. There is no rush. Suggest these milestones first: you can draw basic shapes in any orientation with confidence, you are comfortable with light lines, and you have some gesture practice under your belt.
A gentle path forward:
-
One-point and two-point perspective boxes, then those boxes as furniture and rooms
-
Head and figure construction (the Loomis method is a good starting point for heads)
-
Deeper value studies with 5 values instead of 3
-
Simple composition: where to place a focal point, how to use negative space to guide the eye
-
Pick one topic at a time. Trying to fix everything at once leads to frustration.
If you like structure, a teacher or a course can remove the guesswork of what to practice next. Look for one that starts with line, shape and proportion rather than jumping straight to portraits. Free resources like library books, community classes and free videos can do the job. You do not need to spend a lot of money to dive deeper.
We still return to the simple exercises in this article as our warm ups. Even as we try new topics, the basics never stop being useful. That is what makes them the fundamentals.
16. Putting It All Together: A 30-Day Beginner Drawing Plan
This is the flexible plan we wish we had in early 2022, aimed at adults with limited time. Fifteen to 30 minutes a day, 5 days a week, with one day reserved for playful drawing with no rules.
Week 1: Basic shapes and light lines
-
Fill pages with circles, ellipses, rectangles, triangles
-
Draw 3 kitchen items as basic shapes each day
-
Practice light-to-dark line pressure on one page
Week 2: Objects from life
-
Draw one household object per day from real life (a shoe, a houseplant, a water bottle)
-
Try each object from different angles on different days
-
Use reference images if you want variety, but prioritize real objects on the table
Week 3: Gesture and simple figures
-
Do 10 two-minute gesture drawings per session from reference photos
-
Try one gesture drawing of a family member or friend sitting still
-
Attempt one simple figure using the line of action plus basic shapes
Week 4: Combining everything
-
Set up a still life of three or four things: a mug, a piece of fruit, a small plant
-
Spend 20 to 30 minutes on one drawing, using the full session structure: warm up, gesture, shapes, proportions, cleaner lines, shading with three values
-
Shade one simple object with three values
-
On the last day, redraw the same object you drew on day 1
Iterative practice involves drawing the same subject repeatedly. Each iteration helps you notice new details and improve understanding. Mistakes are part of the iterative drawing process, and iterative practice encourages constant refinement of skills.
Date your drawings at the start and compare at day 30. Drawing the same mug on day 1 and day 30 is a simple, honest test of where you have come. The improvement is usually obvious, and it is yours.
We still consider ourselves learners. We have a pile of sketchbooks, a very honest drawer of failed attempts, and a dining table that gets cleared every Saturday. Drawing is not something you finish. It is something you keep doing, a little at a time, and the fun is in the doing. We hope this plan gives you a place to start. The table will be there next weekend. So will the pencil. Grab it and make some marks.
FAQ
Do I need talent to start drawing?
No. What looks like talent is mostly practice and careful looking. Drawing is a skill developed through practice, observation and patience. We both started with wobbly mugs and improved by repeating simple exercises. There is no talent gate.
How long should I practice each day?
Ten to fifteen minutes is plenty at first. Regular short sessions beat occasional long ones, and you can extend the time once it feels natural and becomes second nature. Even 5 minutes of focused practice drawing counts.
What should I draw first?
Simple objects at home: a mug, a piece of fruit, a shoe, a houseplant. Start with basic shapes and forms before faces, hands or busy scenes. Use what is on the table. You do not need to go looking for ideas.
Should I use a pencil or a pen?
A pencil is more forgiving at first because you can lighten, erase and redraw. Pen is great later for building confidence and bolder lines, but we would begin with an HB or 2B pencil. Once your basic drawing skills feel solid, try a pen for a session and see how it changes your style.
How do I know if I am improving?
Date your sketchbook pages and look back after a month or two. Progress is hard to see day to day but usually obvious over a longer stretch. We keep every page, even the bad ones, because they are the proof that practice works. You can also try painting after a while, once you feel the drawing fundamentals clicking, and you may be surprised how much carries over.